Automation in here means to administrate the Dynamics 365 Business Central (BC) so it will be able to be processed without any human interaction in the BC (a.k.a. scripting)
There are many reasons automation exist: CI/CD is the most common reason. Other reason might be derived from CI/CD, or in my case, to deploy an extension when we have restricted access to BC itself. For instance, it’s not our environment, it’s the client’s.
In order to enable the automation, here are the prerequisite:
- An account that can access and create and setup an Azure Apps Registration
- User that can setup Azure Entra Registration inside the BC Environment
- Of course unrestricted internet, ports, etc. to call BC API later on
I will go through one-by-one. But if you’re impatient, Microsoft already has the article which is accessible in here. I will be just demoing that in more details and graphical way.
Let’s go for the first part, to create an Azure Apps Registration
Create an Azure Apps Registration
Due to many reason, using username and password throughout internet is not highly recommended since very long ago. Many authentication and authorization methods has been developed to reinforce security on that subject. One of those, is using token for the APIs.
BC (cloud) itself don’t manage its authentication and authorization to the internet (on-prem version still has that function though). So for such activities, BC relies on Azure Entra ID to do the authentication and authorization, later on Azure will communicate with BC whether a particular activity is allowed to be run in BC.
Thus you’ll need to have an account to create an Azure Apps Registration on your Azure Portal. Apps Registration itself should be free of charge, even if you don’t have any Azure subscription (tested in my demo tenant).
So, let’s first create a new Azure Apps Registration. It’s highly recommended to create a new Azure Apps Registration FOR EACH BC environment (productions, sandboxes). This one, I will show to create just one for one exact environment
Go to https://portal.azure.com with your account, and find “Apps Registration”

Let’s create a new Apps Registration

For the next screen, pay attention on #1 and #2. If you have multiple tenants, for instance @domain1.com and @domain2.com, you will need to select at least option 2 if you want to be able to use single credential for both tenants. For #2, you have to fill it with that URL https://businesscentral.dynamics.com/OAuthLanding.htm as we will need it later on

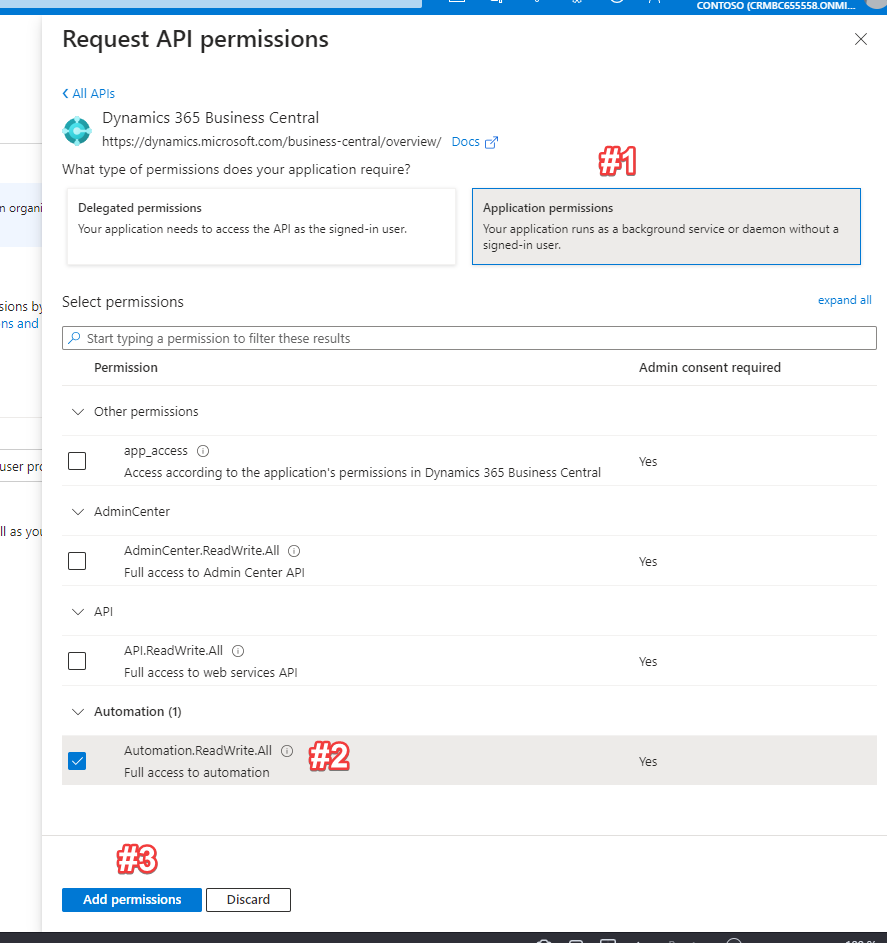
After it’s created, we can configure the Apps Registration settings. Follow #1 until #3

Now, depending of what purpose of your APIs will be, you must select the correct permission for that API. In my case, I would just need the API to be able to update extension, so I select only the automation. Yours might be different.
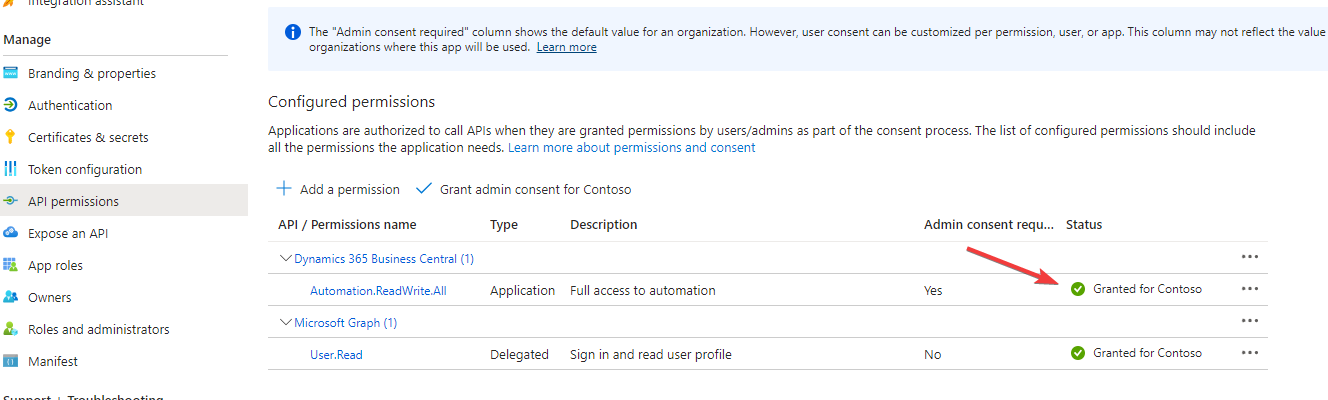
Remember to give admin consent too, just in case. We will need it again later on next part from BC.

Once it’s green, we’re good to set up the client secret
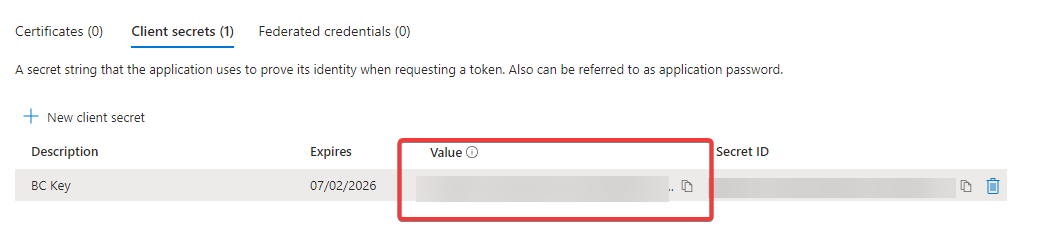
We will need at least one, unless you plan to share the secret with someone else, which later you want to be able to control it

Name anything you want and set the expired date

Now, copy only the value and leave the secret ID
We will also need to take notes of these from Apps Registration Overview for the next part

Now, we have successfully setup the Azure Apps Registration, we can go to the next part